
How to Replace a Vacuum HEPA Filter?
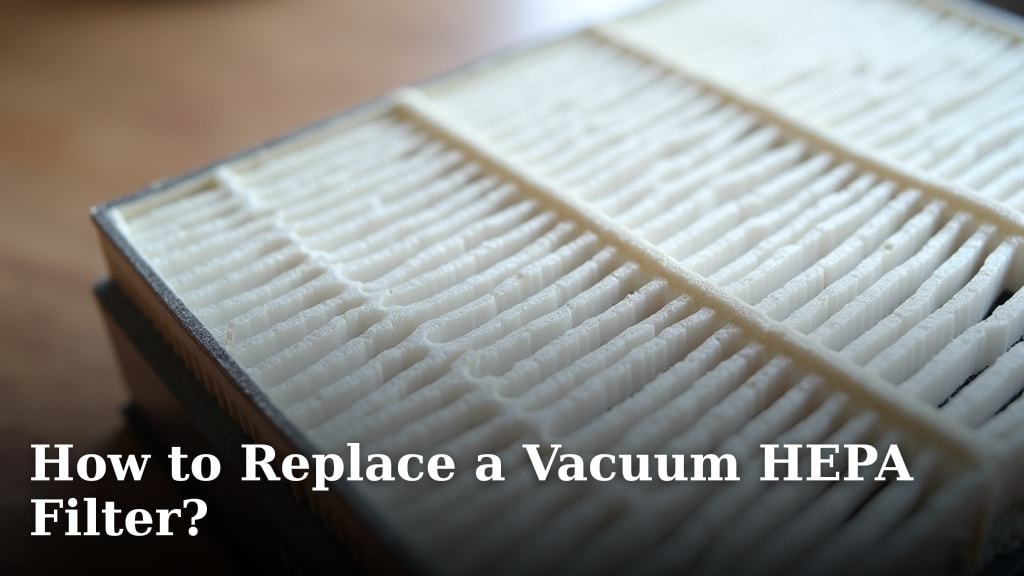
To replace a vacuum HEPA filter, you first need to locate your filter, remove the old one, and then insert a new, clean HEPA filter securely. This simple maintenance step helps your vacuum work its best and keeps your home’s air cleaner.
You might be wondering if replacing this filter is really that important. We found that a fresh HEPA filter traps tiny particles effectively, including allergens and pet dander. This is crucial for maintaining good indoor air quality, especially if you have allergies.
TL;DR
- Find your vacuum’s filter compartment.
- Remove the old, dirty HEPA filter.
- Insert the new filter correctly.
- Enjoy cleaner air and better suction.
Ready to make your vacuum perform like new? Let’s walk through the steps to replace your vacuum HEPA filter, ensuring you get it right every time.
Replacing Your Vacuum’s HEPA Filter
You’re ready to swap out that old filter and get your vacuum running like new. This process is straightforward and makes a big difference in your home’s air quality.
We’ll walk you through finding the filter, taking it out, and putting a fresh one in. It’s easier than you might think!
Understanding HEPA Filters
First, what exactly is a HEPA filter? HEPA stands for “High-Efficiency Particulate Air.” It’s a type of mechanical air filter that can trap very tiny particles.
We found that true HEPA filters must meet specific standards. They must capture 99.97% of particles that are 0.3 microns in size (Environmental Protection Agency).
This includes things like dust mites, pet dander, pollen, and even some bacteria. That’s why they are so important for clean indoor air.
The Difference Between “HEPA-type” and True HEPA
You might see vacuums advertised with “HEPA-type” or “HEPA-style” filters. It’s important to know the difference.
“HEPA-type” filters are designed to filter similar particles but don’t meet the strict efficiency standards of true HEPA filters. They are usually less effective.
Always look for packaging that clearly states “True HEPA” or “Meets HEPA standards” for the best filtration performance. This ensures you’re getting the quality you need.
Why Replace Your HEPA Filter?
Think of your vacuum’s HEPA filter like a lung for your home. Over time, it gets clogged with all the dust and debris it captures.
A dirty filter can’t do its job well. This means more allergens are released back into your air as you vacuum.
Impact on Air Quality
If you or your family members have allergies or asthma, a clean HEPA filter is even more important. A clogged filter lets microscopic particles escape.
Many studies show that improved filtration helps reduce allergy symptoms in the home (National Institutes of Health). Don’t let a dirty filter undo your cleaning efforts.
Impact on Vacuum Performance
Beyond air quality, a clogged filter also affects your vacuum’s suction power. When airflow is restricted, the motor has to work harder.
This can lead to reduced cleaning effectiveness, overheating, and even a shorter lifespan for your vacuum. Regular replacement keeps your vacuum efficient.
When Should You Replace Your HEPA Filter?
This is a common question, and the answer isn’t always a strict timeline. It depends on several factors.
Most manufacturers recommend replacing your HEPA filter every 6 to 12 months. However, your usage might call for more frequent changes.
Factors Affecting Replacement Frequency
- Pets: If you have furry friends, pet dander will clog your filter faster.
- Allergies/Asthma: For those with sensitivities, more frequent changes are beneficial.
- Usage: Do you vacuum daily or once a week? Heavy use means quicker clogging.
- Home Environment: Dusty homes, construction nearby, or lots of carpet can accelerate filter saturation.
We found that a visual check is often the best guide. Hold your filter up to a light. If you can’t see light passing through easily, it’s time for a new one.
Gathering Your Supplies
Before you start, make sure you have everything you need. This will make the process smooth and quick.
Here’s a quick checklist:
- Your vacuum cleaner.
- A new, compatible HEPA filter.
- Gloves (optional, but good for handling dirty filters).
- A trash bag.
- A small brush or cloth for cleaning the filter compartment (optional).
Always use a new filter that is specifically designed for your vacuum model. Check your vacuum’s manual or the manufacturer’s website for the correct part number.
Step-by-Step Guide to Replacing Your HEPA Filter
Okay, let’s get down to business. Follow these steps carefully to ensure a proper replacement.
Step 1: Unplug Your Vacuum
Safety first! Always unplug your vacuum cleaner from the power outlet before doing any maintenance. This prevents accidental starts.
It’s a simple step, but it’s often overlooked. Don’t skip it; it keeps you safe.
Step 2: Locate the HEPA Filter
The location of the HEPA filter varies by vacuum model. We found it’s most commonly in one of these places:
| Vacuum Type | Common Filter Location |
|---|---|
| Upright Vacuums | Near the dirt cup, at the bottom rear, or side panel. |
| Canister Vacuums | Inside the canister body, often behind a removable panel. |
| Stick Vacuums | Around the dustbin, sometimes requiring the bin to be removed first. |
| Robotic Vacuums | Underneath the robot, often accessed by flipping it over. |
If you’re unsure, consult your vacuum’s user manual. It will have diagrams showing the exact filter placement.
Step 3: Remove the Old Filter
Once you’ve located the filter compartment, open it up. There might be a latch, a button, or a twist mechanism.
Carefully pull out the old HEPA filter. It will likely be dark, dusty, and perhaps a bit smelly. This is normal!
Try to hold it over a trash bag as you remove it to catch any loose debris. This prevents dust from spreading back into your clean space.
Step 4: Clean the Filter Compartment (Optional)
While the filter is out, take a moment to look at the compartment. You might see some dust buildup.
Use a small brush, a dry cloth, or even another vacuum (if you have one handy) to gently clean out any loose dirt. This helps maintain good airflow for the new filter.
Step 5: Insert the New HEPA Filter
Unwrap your new HEPA filter. Make sure you’re handling it by the edges if possible to keep the filter material clean.
Pay attention to the orientation. Many HEPA filters have an arrow indicating airflow direction. Ensure it’s pointing in the correct way, usually towards the vacuum’s motor.
Gently slide the new filter into the compartment until it’s seated firmly. It should fit snugly without forcing it.
Step 6: Close the Compartment and Test
Close the filter compartment securely. Make sure all latches or covers are properly fastened. You might hear a “click.”
Plug your vacuum back in and give it a quick test run. You should notice improved suction right away, and perhaps even a quieter motor.
Enjoy the feeling of a vacuum that’s breathing easy again, and know you’re doing your part for cleaner air!
Disposing of Your Old HEPA Filter
Your old HEPA filter is full of dust, allergens, and other microscopic gunk. You don’t want to release that back into your home.
Place the old filter directly into a sealed plastic bag before putting it in your regular trash. This prevents dust from escaping. Think of it as putting a lid on a dirty jar.
Check with your local waste management if they have specific guidelines for disposing of these types of filters. Most often, they can go in the regular household trash.
Conclusion
Replacing your vacuum’s HEPA filter is a small task with big rewards. You’ll breathe easier, especially if you have allergies, and your vacuum will perform much better. We found that this simple maintenance step extends your vacuum’s life and keeps your home truly clean.
Don’t wait until your vacuum struggles or your allergies flare up. Check your filter today and experience the difference a fresh HEPA filter makes. Your home, and your lungs, will thank you!
Frequently Asked Questions
Can I wash my vacuum’s HEPA filter instead of replacing it?
It depends on your specific filter. Some HEPA filters are labeled “washable,” but many are not. Washing a non-washable filter can damage its delicate fibers, making it less effective or even useless. Always check your vacuum’s manual to be sure.
How do I know if my vacuum uses a true HEPA filter?
Look for packaging or product descriptions that explicitly state “True HEPA” or “Meets HEPA standards.” If it only says “HEPA-type” or “HEPA-style,” it doesn’t meet the strict filtration efficiency of a true HEPA filter. We found this distinction is important for maximum particle capture.
What happens if I don’t replace my HEPA filter regularly?
Neglecting your HEPA filter can lead to several problems. Your vacuum’s suction will decrease, making it less effective at cleaning. More allergens and dust will also be released back into your home’s air, which is bad for indoor air quality and can worsen allergy symptoms.
Where can I buy a replacement HEPA filter for my vacuum?
You can usually find replacement HEPA filters on your vacuum manufacturer’s website or at major retailers that sell vacuum cleaners. Always use the exact part number or model specified for your vacuum. We recommend having a spare filter on hand.
Can a dirty HEPA filter make my vacuum smell bad?
Yes, a dirty HEPA filter can definitely contribute to a bad smell coming from your vacuum. The filter traps a lot of dust, pet dander, and other particles, which can start to smell stale or musty over time. Replacing it often eliminates these odors.
