How To Use A Vacuum Cleaner Step By Step?

To use a vacuum cleaner effectively, first prepare the area by clearing clutter, then select the appropriate attachment and settings for your floor type. Plug in the vacuum safely and move in slow, overlapping strokes, starting from the farthest point of the room towards the exit.
For best results when learning how to use a vacuum cleaner step by step, ensure you empty the dust bin or bag regularly and clean the filters to maintain optimal suction power and extend your machine’s lifespan.
- Get started by clearing your space and choosing the right vacuum attachment.
- Understand your vacuum’s settings for different floor types, like carpets or hard floors.
- Vacuum methodically, using slow, overlapping passes for thorough cleaning.
- Use specialized tools for corners, upholstery, and other hard-to-reach areas.
- Always perform quick maintenance after each use to keep your vacuum running efficiently.
How To Use A Vacuum Cleaner Step By Step?
Using a vacuum cleaner correctly can transform your cleaning routine from a chore into an efficient task. We’ve found that a little preparation and understanding of your machine goes a long way to ensure a truly clean home.
Before You Start: Prepping for a Smooth Clean
Before you even plug in your vacuum, take a few moments to set yourself up for success. This preparation will make your vacuuming much more effective and save you time in the long run.
Clear the Floor Clutter
Imagine pushing a shopping cart through a toy store – you don’t want to run over anything! Similarly, pick up any small items like toys, papers, or loose cords. These can get sucked up, damage your vacuum, or even become a safety hazard.
Check the Dust Bin or Bag
Is your vacuum bin overflowing, or is the bag nearly full? Many experts say that a full dust receptacle significantly reduces suction power (Consumer Reports). Empty it before you begin to ensure maximum efficiency for your cleaning session.
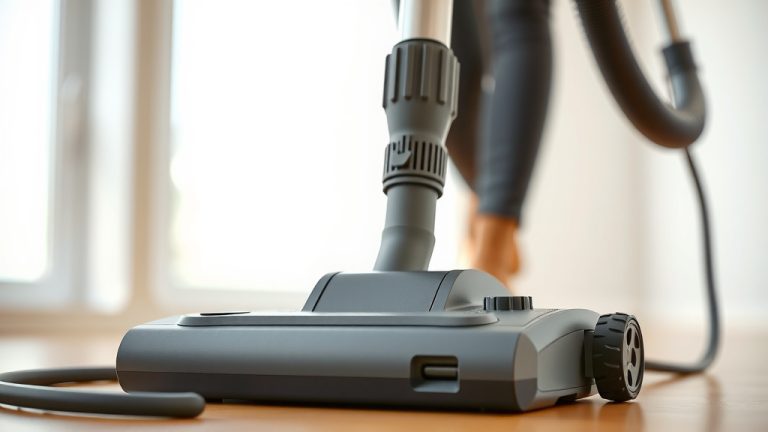
Choose the Right Attachment
Think of your vacuum attachments as tools in a toolkit; each has a specific job. You wouldn’t use a screwdriver to hammer a nail, right? Select the appropriate nozzle or brush for the surface you’re cleaning, whether it’s carpet, bare floor, or upholstery.
Understanding Your Vacuum Cleaner
Vacuums aren’t one-size-fits-all, and neither are their settings. Knowing your machine’s capabilities is key to getting the best clean. Do you know what all those buttons and switches actually do?
Different Types and Their Nuances
You might have an upright, a canister, a stick vacuum, or even a robot vacuum. Each type has its own strengths. For instance, uprights are often great for carpets, while canister models offer more versatility with attachments for various surfaces and heights.
Settings and Controls
Most vacuums have a few core controls. Look for the power switch, often located near the handle or base. You’ll also likely find a switch to turn the brush roll on or off, which is crucial for different floor types.
The Brush Roll Dilemma: On or Off?
When vacuuming carpets, keep the brush roll on to agitate fibers and lift dirt. However, for hard floors like wood or tile, switch the brush roll off. A spinning brush roll can scatter debris or scratch delicate surfaces (National Wood Flooring Association).
Safety First: A Quick Check
Before you get into the rhythm of cleaning, always prioritize safety. A few quick checks can prevent accidents and ensure your vacuum operates correctly.
Plugging In Safely
Always plug your vacuum into a functional outlet. Avoid using extension cords unless absolutely necessary, and ensure the cord is fully unwound to prevent overheating. Never yank the cord from the wall; grasp the plug itself.
Cord Management
If your vacuum has a cord, keep an eye on it. Drape it over your shoulder if it’s long, or gently guide it behind you to prevent tripping hazards. Also, make sure it doesn’t get caught under the vacuum itself.
Step-by-Step Vacuuming Guide for Floors
Now that you’re prepped and understand your machine, let’s get down to the actual vacuuming. Think of it like painting a room: consistent, even strokes yield the best results.
Start High, Go Low
Begin by vacuuming furniture, drapes, or shelves with appropriate attachments, allowing any dust to settle. Then, move to the floors. When cleaning a room, start from the farthest point and work your way towards the door. This prevents you from walking over freshly vacuumed areas.
Overlap Your Strokes
Don’t just push the vacuum randomly. Use a consistent, overlapping motion, much like mowing a lawn. Each pass should slightly overlap the previous one by about half the width of the cleaning head. This ensures no spots are missed (Good Housekeeping Institute).
Slow and Steady Wins the Race
Resist the urge to rush. Moving the vacuum slowly allows the suction and brush roll (if on) ample time to collect dirt and debris from the floor. A quick sweep often leaves more behind than you realize.
Dealing with Stubborn Spots
For particularly dirty or high-traffic areas, make a few extra passes. You can also try moving the vacuum in different directions—for example, perpendicular to your original strokes—to lift embedded dirt from carpet fibers.
Hardwood vs. Carpet: Adjusting Your Technique
Different floor types call for different approaches. Using the wrong technique can be ineffective or even damaging.
| Floor Type | Brush Roll Setting | Recommended Suction | Ideal Attachment/Tool |
|---|---|---|---|
| Carpet (Low Pile) | On | High | Main Powerhead |
| Carpet (High Pile) | On (Adjust Height) | Medium-High | Main Powerhead |
| Hardwood/Tile | Off | Medium-Low | Bare Floor Tool / Main Powerhead (Brush Roll Off) |
| Delicate Rugs | Off | Low | Dusting Brush / Upholstery Tool |
Using Attachments Like a Pro
Your vacuum isn’t just for floors. Those extra tools are there for a reason and can help you clean nearly every surface in your home.
- Crevice Tool: This narrow nozzle is perfect for tight spaces like between couch cushions, along baseboards, and in car interiors. We’ve found it’s unmatched for reaching crumbs and hidden dust.
- Dusting Brush: With soft bristles, this tool gently cleans delicate surfaces such as lampshades, blinds, and shelves without scratching. It’s like a soft broom for your vacuum, ideal for picking up fine dust particles.
- Upholstery Tool: Often wider with a flat opening, this attachment is designed for cleaning fabric surfaces like sofas, chairs, and curtains. It helps remove pet hair and dust without damaging the material, keeping your furniture fresh and clean.
Maintenance After Vacuuming
A little post-vacuuming care ensures your machine stays in top shape for years to come. Think of it as thanking your vacuum for its hard work!
Emptying the Dust Bin or Bag
This is arguably the most important step. A full bin or bag hampers performance. Many manufacturers recommend emptying the bin after each use to prevent odor and maintain suction.
Cleaning Filters
Depending on your vacuum, you might have washable or replaceable filters. Check your manual for specific instructions. Clean filters are essential for optimal airflow and preventing allergens from recirculating (EPA).
Checking the Brush Roll
Hair, string, and fibers often get tangled around the brush roll. Periodically check and carefully cut away any wrapped debris. A clean brush roll spins freely, ensuring it effectively agitates carpets and picks up dirt.
Troubleshooting Common Vacuum Issues
Even the best vacuums can have a hiccup now and then. Don’t panic; many common problems have simple solutions.
Loss of Suction
If your vacuum isn’t picking up dirt, first check the dust bin/bag. Then, inspect the hose and attachments for blockages. A quick visual check can often spot a clog quickly. Also, make sure your filters are clean.
Strange Noises
Unusual grinding or whining sounds can indicate a problem. Turn off and unplug the vacuum immediately. Check the brush roll for foreign objects. Sometimes, a simple fix like removing a coin or a piece of plastic can resolve the issue.
Your Pre-Vacuum Checklist: A Quick Scan
Make these quick checks part of your routine for a more efficient clean:
- Is the dust bin empty or the bag new?
- Are all large items cleared from the floor?
- Is the correct attachment on the vacuum?
- Is the power cord in good condition and safely plugged in?
- Is the brush roll setting correct for your floor type?
Conclusion
Mastering how to use a vacuum cleaner step by step truly empowers you to maintain a cleaner, healthier home. By following these practical steps, from proper preparation and understanding your machine to effective cleaning techniques and vital after-care, you’ll not only achieve superior results but also extend the life of your valuable appliance. Remember, a little knowledge and consistent effort are all it takes to keep your floors spotless and your air fresh. So, go ahead, give your home the thorough clean it deserves!
How often should I empty my vacuum cleaner’s dust bin?
Many experts suggest emptying the dust bin after each use, or at least when it’s two-thirds full. This practice ensures consistent suction power and prevents unpleasant odors from accumulating. For homes with pets or allergy sufferers, more frequent emptying is a good idea.
Can I use my vacuum cleaner on both carpets and hard floors?
Yes, most modern vacuum cleaners are designed for both surfaces. The key is to adjust the brush roll setting: turn it on for carpets to agitate fibers, and turn it off for hard floors to prevent scattering debris or scratching the surface. Some models also have adjustable height settings for different carpet piles.
What should I do if my vacuum cleaner loses suction power?
First, check if the dust bin is full or the bag needs changing. Next, inspect the hose, attachments, and main air pathways for any blockages or clogs. Also, clean or replace your filters according to your vacuum’s manual. These are the most common culprits for reduced suction.
How do I clean the filters in my vacuum cleaner?
The method for cleaning filters varies by vacuum model and filter type. Many washable filters can be rinsed under cool water until the water runs clear, then allowed to air dry completely for at least 24 hours before reinserting. Non-washable filters usually need to be tapped to remove dust or replaced periodically. Always check your specific owner’s manual for precise instructions.
Are vacuum attachments really necessary, or just extra bits?
Vacuum attachments are incredibly useful and can significantly improve your cleaning results beyond just floors. Tools like the crevice tool, dusting brush, and upholstery tool allow you to clean stairs, furniture, curtains, vents, and tight corners that the main vacuum head cannot reach, ensuring a much more comprehensive clean of your entire home.