How To Maintain A Vacuum Cleaner?

To maintain a vacuum cleaner, regularly empty the dust bin or replace the bag, clean or replace filters, untangle hair from the brush roll, and check hoses for blockages. These steps help keep your vacuum running efficiently and extend its life.
Proper vacuum cleaner maintenance prevents loss of suction, reduces the need for costly repairs, improves air quality, and ensures your home stays truly clean with less effort.
TL;DR: Keep Your Vacuum Happy!
- Empty the dust bin or change the bag often for best suction.
- Clean or replace filters regularly to maintain airflow and air quality.
- Remove hair and debris from the brush roll to prevent jams.
- Check hoses and attachments for clogs or damage.
- A little routine care saves you money and keeps your home cleaner.
How To Maintain A Vacuum Cleaner?
Maintaining a vacuum cleaner involves simple, routine steps like emptying debris, cleaning filters, and clearing the brush roll. This keeps your machine powerful and your home spotless.
Why Bother with Vacuum Maintenance?
Imagine your trusty vacuum suddenly losing its pick-up power. Frustrating, right? Taking a few minutes to care for your vacuum means it will work harder for you, for longer. It’s like changing the oil in your car; a small effort saves big headaches down the road.
We found that a well-maintained vacuum doesn’t just clean better. It also improves the air quality in your home. Nobody wants dust recirculating because of a clogged filter, do they? Many experts say regular cleaning helps your vacuum perform at its peak (EPA).
The Dirtiest Secret: Emptying Your Dust Bin
This might seem obvious, but it’s often overlooked. If your vacuum has a bagless canister, empty it after every use or when it’s two-thirds full. For bagged models, change the bag before it gets completely stuffed. A full bin or bag severely restricts airflow.
Think of it like trying to breathe with a hand over your mouth. Your vacuum struggles! Regularly emptying ensures maximum suction power. It also prevents dirt and debris from backing up into the motor, which could cause damage.
Here’s a simple guide to how often you should check different parts:
| Vacuum Part | Maintenance Frequency |
|---|---|
| Dust Bin / Bag | After every use or when 2/3 full |
| Pre-Motor Filter | Wash/clean monthly (if washable) |
| Post-Motor / HEPA Filter | Replace every 6-12 months |
| Brush Roll | Check and clean monthly |
| Hose / Attachments | Check for clogs monthly |
Cleaning or Replacing Your Filters
Filters are your vacuum’s lungs. They trap dust, allergens, and tiny particles, keeping them out of your air. Over time, these filters get clogged. This restricts airflow and causes your vacuum to lose suction significantly. Many vacuums have several filters.
Foam and Felt Filters
Many common vacuums use foam or felt filters located near the dust bin. These are often washable! Rinse them under cool, running water until the water runs clear. Then, let them air dry completely for at least 24 hours before putting them back. A damp filter can damage your vacuum.
HEPA Filters
HEPA (High-Efficiency Particulate Air) filters are amazing for trapping microscopic particles, making your air much cleaner. However, most HEPA filters are not washable. You’ll typically need to replace them every 6 to 12 months, depending on your usage. Check your vacuum’s manual for specific recommendations.
Untangling the Brush Roll
Ever notice hair, string, or carpet fibers wrapped around your vacuum’s brush roll? This is a common culprit for poor performance. It can stop the brush from spinning, preventing your vacuum from effectively picking up debris. Gently flip your vacuum over and look.
Use scissors or a seam ripper to carefully cut through the tangled mess. Always unplug the vacuum first for safety! This simple step can dramatically improve your vacuum’s efficiency and prevent motor strain. It’s a quick fix that makes a huge difference.
What if Your Brush Roll Stops Spinning?
If your brush roll isn’t spinning, even after clearing it, check for a broken belt. Most vacuums use a belt to connect the motor to the brush roll. This is a common wear-and-tear item and can often be replaced at home with a few simple tools. If you’re unsure, consult your vacuum’s manual.
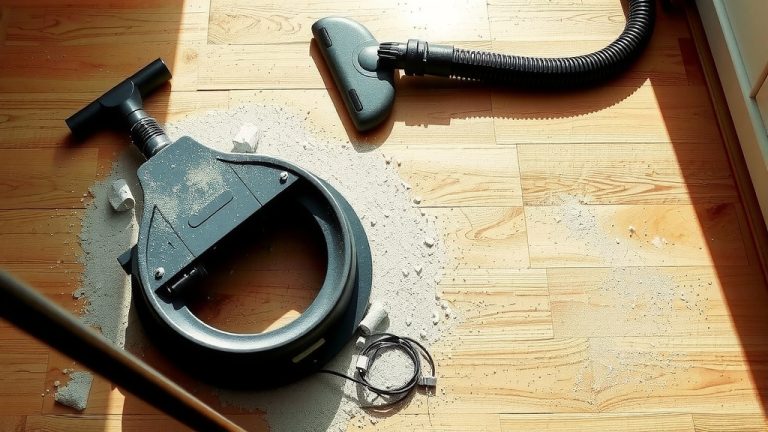
Checking Hoses and Attachments
Sometimes, the problem isn’t the vacuum itself, but a blockage in the hose or attachments. Disconnect the hose from both ends and look through it. Use a broom handle or a long, flexible brush to dislodge any clogs. We found that forgotten socks or toy parts are often to blame!
Also, inspect the hose for any cracks or tears. Even a small hole can cause a significant loss of suction. If you find damage, consider replacing the hose. Damaged hoses reduce efficiency and make cleaning much harder. Don’t forget to check all the attachments too.
Don’t Forget the Wheels and Outer Casing
A quick wipe-down of the outer casing helps keep your vacuum looking good. More importantly, take a moment to clean the wheels. Hair and debris can get tangled around the axles, making your vacuum harder to push. A simple pick or small brush can help clear them out.
Your Quick Vacuum Maintenance To-Do List:
- Empty dirt bin/change bag often.
- Clean/replace filters as recommended.
- Untangle hair from the brush roll.
- Check hoses for blockages or cracks.
- Wipe down the exterior and clean wheels.
- Inspect the power cord for damage.
When to Seek Professional Help?
While many vacuum issues can be handled at home, some problems might need a pro. If your vacuum motor sounds strange, smells burnt, or completely stops working, it’s often best to consult a repair technician. Attempting complex repairs yourself could void a warranty or cause further damage. Many experts suggest this approach.
Sometimes, the cost of repair might outweigh the value of an older machine. Consider whether it’s time for a new model if repairs are frequent or expensive. We found that reliable vacuums last for years with good care, but they aren’t immortal.
Small Habits, Big Impact
Making vacuum maintenance a regular habit doesn’t take much time, but it yields huge rewards. A few minutes of care each week can mean the difference between a vacuum that barely works and one that performs like new for years. It’s about being proactive, not reactive, when it comes to keeping your home clean.
Remember, your vacuum works hard for you. Show it a little love, and it will keep your floors sparkling. A little care goes a long way in preserving your investment and ensuring a cleaner, healthier home environment.
Conclusion
Maintaining your vacuum cleaner doesn’t have to be a chore; it’s a smart investment in your cleaning efficiency and air quality. By consistently emptying debris, tending to filters, clearing brush rolls, and checking for clogs, you can keep your vacuum operating at its best. These simple, routine tasks will save you money on repairs and extend the life of your machine, ensuring your home remains spotless with minimal effort. Prioritize these steps, and your vacuum will be a reliable workhorse for years to come.
What causes a vacuum cleaner to lose suction?
A vacuum cleaner typically loses suction due to a full dust bag or bin, clogged filters, blockages in the hose or attachments, or debris tangled in the brush roll. Addressing these common issues often restores full suction.
How often should I clean my vacuum filters?
For washable foam or felt filters, it’s generally recommended to clean them monthly. HEPA filters, which are usually not washable, should be replaced every 6 to 12 months, depending on usage and your vacuum model’s guidelines.
Can I wash a HEPA filter?
Most HEPA filters are designed for dry use only and are not washable. Washing them can damage the filter material and reduce their effectiveness. Always check your vacuum’s manual for specific care instructions regarding HEPA filters.
What should I do if my vacuum smells burnt?
If your vacuum smells burnt, immediately turn it off and unplug it. This often indicates a motor problem, a clogged brush roll causing strain, or an electrical issue. It’s best to have it inspected by a professional to prevent further damage or safety risks.
Is it worth repairing an old vacuum cleaner?
Whether to repair an old vacuum depends on the repair cost versus the price of a new machine, and the extent of the damage. For minor issues like a broken belt or clogged hose, repair is often cost-effective. However, if the motor is failing or multiple parts are broken, buying a new vacuum might be a more practical decision.