
How to Clean Vacuum Sensors on a Robot Vacuum?
The easiest way to clean vacuum sensors on your robot vacuum is with a dry microfiber cloth or a soft brush. This helps ensure your robot can navigate your home effectively. You’ll want to tackle this task regularly to keep your robot running smoothly. It’s a simple maintenance step that makes a big difference.
Dirty sensors can cause your robot vacuum to miss spots or get stuck. They can even lead it to bump into things more often than it should. Keeping these small but mighty parts clean is key to Dirty sensors can cause your robot vacuum to miss spots or get stuck. Our guide explains why this happens.optimal performance and a cleaner home. We found many robot vacuum owners overlook this, but it’s quite straightforward.
- Wipe sensors with a dry cloth.
- Use a soft brush for stubborn dust.
- Clean them when you empty the dustbin.
- Prevent navigation issues.
- Keep your robot working efficiently.
Let’s walk through exactly how to give those sensors a good clean, step by step. You’ll be surprised how quick and easy it is!
Keeping Your Robot Vacuum’s Sensors Clean for Peak Performance
Your robot vacuum relies on its sensors to navigate your home without a hitch. If these sensors get dusty or dirty, your little helper can start acting a bit quirky. This guide will show you how to easily clean them. We’ll make sure your robot can see its way around for a truly automated clean.
Why Robot Vacuum Sensors Need Regular Cleaning
Think of your robot vacuum’s sensors like its eyes. They help it detect walls, stairs, and furniture. When these sensors are blocked by dust or debris, your robot can get confused. It might repeatedly bump into things. You could also see it getting stuck in the same spot. Sometimes, it might even stop working altogether.
Common Sensor Issues Caused by Dirt
Dirty sensors can lead to a range of frustrating problems. You might notice your robot vacuum cleaning the same area over and over. It could also leave entire sections of your floor untouched. Some robots may even refuse to start their cleaning cycle. These are all signs that its “eyes” need a good wipe-down. Many cleaning experts note that this is one of the most common reasons for robot vacuum malfunctions.
How Often Should You Clean Them?
We recommend cleaning your robot vacuum’s sensors at least once a week. If you have pets or a lot of dust in your home, you might need to do it more often. A good habit is to clean them every time you empty the dustbin. This makes it a quick part of your regular robot maintenance routine. Keeping them clear ensures your robot works its best.
Locating Your Robot Vacuum’s Sensors
Before you can clean them, you need to find them. Most robot vacuums have sensors located in a few key places. You’ll typically find them along the edges and underneath the robot. Some models also have sensors on the top. Check your robot’s manual if you’re unsure about your specific model’s sensor locations.
Common Sensor Types and Locations
You’ll usually find cliff sensors on the underside of your robot. These prevent it from tumbling down stairs. They look like small, dark windows. There are also wall or proximity sensors, often found along the sides. These help your robot avoid bumping into furniture. Some models might have a camera or lidar sensor on top for mapping.
Consulting Your Robot Vacuum’s Manual
Every robot vacuum is a little different. Your owner’s manual is your best friend here. It will show you exactly where all the sensors are on your particular model. It might also offer specific cleaning instructions. We found that manuals often have helpful diagrams. Always refer to it for the most accurate information.
Step-by-Step Guide to Cleaning Robot Vacuum Sensors
Cleaning your robot’s sensors is a straightforward process. You won’t need any special tools or chemicals. Just a few simple items will do the trick. Follow these steps for a thorough cleaning. This will help your robot navigate your home like a champ.
Gathering Your Cleaning Supplies
What do you need? It’s surprisingly simple. You’ll want a clean, dry microfiber cloth. These cloths are great because they don’t leave lint behind. You might also need a soft-bristled brush. A small paintbrush or an old, clean toothbrush works well. Ensure there are no loose bristles on the brush.
Wiping Down the Sensors
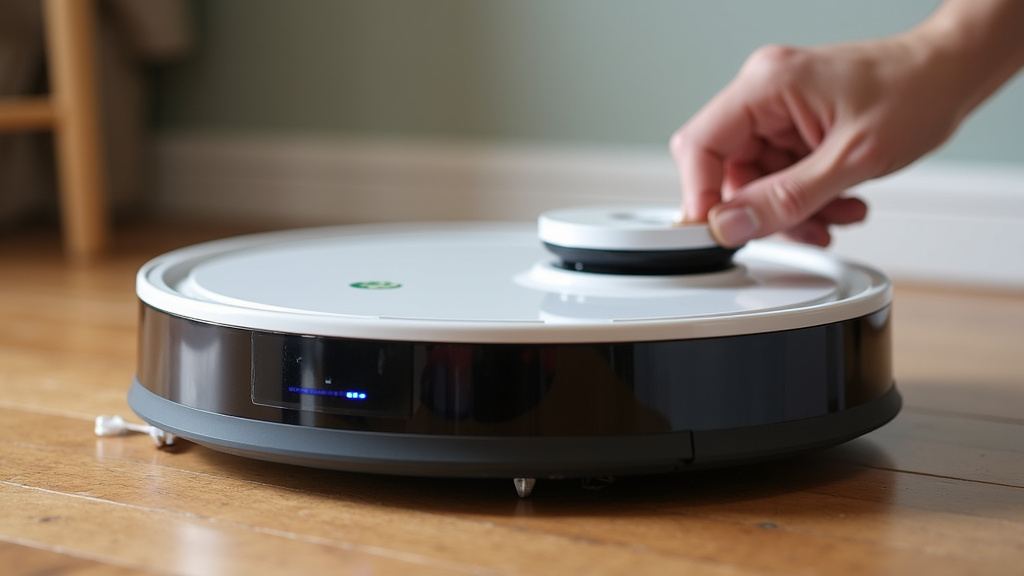
Start by powering off your robot vacuum. Then, gently wipe each sensor lens with your dry microfiber cloth. Use a light touch. You’re just trying to remove dust and smudges. Don’t apply too much pressure. For stubborn grime, you can slightly dampen a corner of the cloth with water. Make sure the cloth is barely damp, not wet.
Dealing with Stubborn Dust and Grime
If dust is caked on, your microfiber cloth might not be enough. This is where your soft brush comes in handy. Gently brush away any dried-on dirt from the sensor areas. Work carefully to avoid scratching the sensor lenses. After brushing, give them another wipe with the dry microfiber cloth to pick up any loose particles. Many users found this method effective.
Cleaning Underside Sensors
Don’t forget the sensors on the bottom! Turn your robot vacuum over. You’ll see the cliff sensors, usually near the wheels. Wipe these carefully with your microfiber cloth. Any dirt or debris here can make your robot think it’s about to fall. Keeping them clean is essential for safe operation. You’ll see the cliff sensors, usually near the wheels. Our guide explains how robot vacuums handle stairs.
Checking the Charging Contacts
While you’re cleaning the sensors, it’s a good idea to clean the charging contacts too. These are usually metal plates on the robot and its charging dock. Wipe them gently with a dry cloth. Dirty contacts can prevent your robot from charging properly. This is a simple step that ensures your robot is always ready to go.
Preventing Future Sensor Issues
Once your sensors are clean, how can you keep them that way? A little preventative care goes a long way. Regular cleaning is the best defense. You can also try to keep your home as dust-free as possible. This means more frequent vacuuming of floors, ironically!
Establishing a Cleaning Schedule
Consistency is key. Set a reminder to clean your robot’s sensors weekly. If your robot has a self-emptying base, clean the sensors every time it docks. This simple routine will prevent buildup before it becomes a problem. Many robot vacuum owners swear by this method.
Maintaining a Cleaner Home Environment
The cleaner your home is overall, the less dust and debris will accumulate on your robot. Regular dusting of surfaces can help reduce airborne particles. Keeping floors clear of excessive clutter also helps your robot navigate more easily. Think of it as a partnership between you and your cleaning robot!
Quick Checklist for Sensor Cleaning
Here’s a handy checklist to help you remember the important steps:
- Power off robot.
- Locate all sensors.
- Wipe sensors with a dry microfiber cloth.
- Use a soft brush for stubborn dirt.
- Clean charging contacts.
- Schedule regular cleaning.
When to Seek Professional Help
In rare cases, even after thorough cleaning, your robot vacuum might still behave erratically. If you’ve cleaned the sensors diligently and your robot continues to have navigation issues, there might be a deeper problem. This could be a faulty sensor or a software glitch. In such situations, it’s best to contact the manufacturer’s customer support. They can offer further troubleshooting or repair options.
Conclusion
You’ve learned that keeping your robot vacuum’s sensors clean is a simple yet vital maintenance task. A dry microfiber cloth and a soft brush are your best tools for this job. Regular cleaning prevents common navigation problems and ensures your robot works efficiently. By making sensor cleaning a habit, like when you empty the dustbin, you help your robot perform at its best. Don’t let dirty sensors get in the way of your automated cleaning. Your next step is to grab that microfiber cloth and give your robot’s “eyes” a quick wipe!
Frequently Asked Questions
Can I use a wet cloth to clean my robot vacuum’s sensors?
It’s best to use a dry microfiber cloth first. If there’s stubborn grime, you can slightly dampen a corner of the cloth with water. Make sure the cloth is barely damp, never wet, to avoid damaging the sensors.
What happens if I don’t clean my robot vacuum’s sensors?
Dirty sensors can cause your robot to miss spots, get stuck frequently, bump into objects more often, or even fail to start its cleaning cycle. This leads to inefficient cleaning and potential frustration.
How can I tell if my robot vacuum’s sensors are dirty?
Signs include the robot repeatedly cleaning the same area, leaving parts of your floor untouched, getting stuck in familiar places, or bumping into walls and furniture more than usual. It might also stop working or give error messages.
Are the charging contacts also important to clean?
Yes, absolutely. While you’re cleaning the sensors, take a moment to wipe the charging contacts on both the robot and its dock with a dry cloth. Clean contacts ensure your robot can charge properly and is always ready for its next cleaning job.
My robot still isn’t navigating well after cleaning. What else could be wrong?
If you’ve cleaned the sensors thoroughly and your robot still has navigation issues, there might be a different problem. This could be a faulty sensor, a software glitch, or another internal issue. Contacting the manufacturer’s customer support is the best next step.
